Conversational AI
How to set up and use the Telnyx Local MCP Server
Quickly integrate Telnyx MCP server to manage phone numbers, streamline communications, and easily deploy AI-powered assistants.

<script src="https://player.vimeo.com/api/player.js">
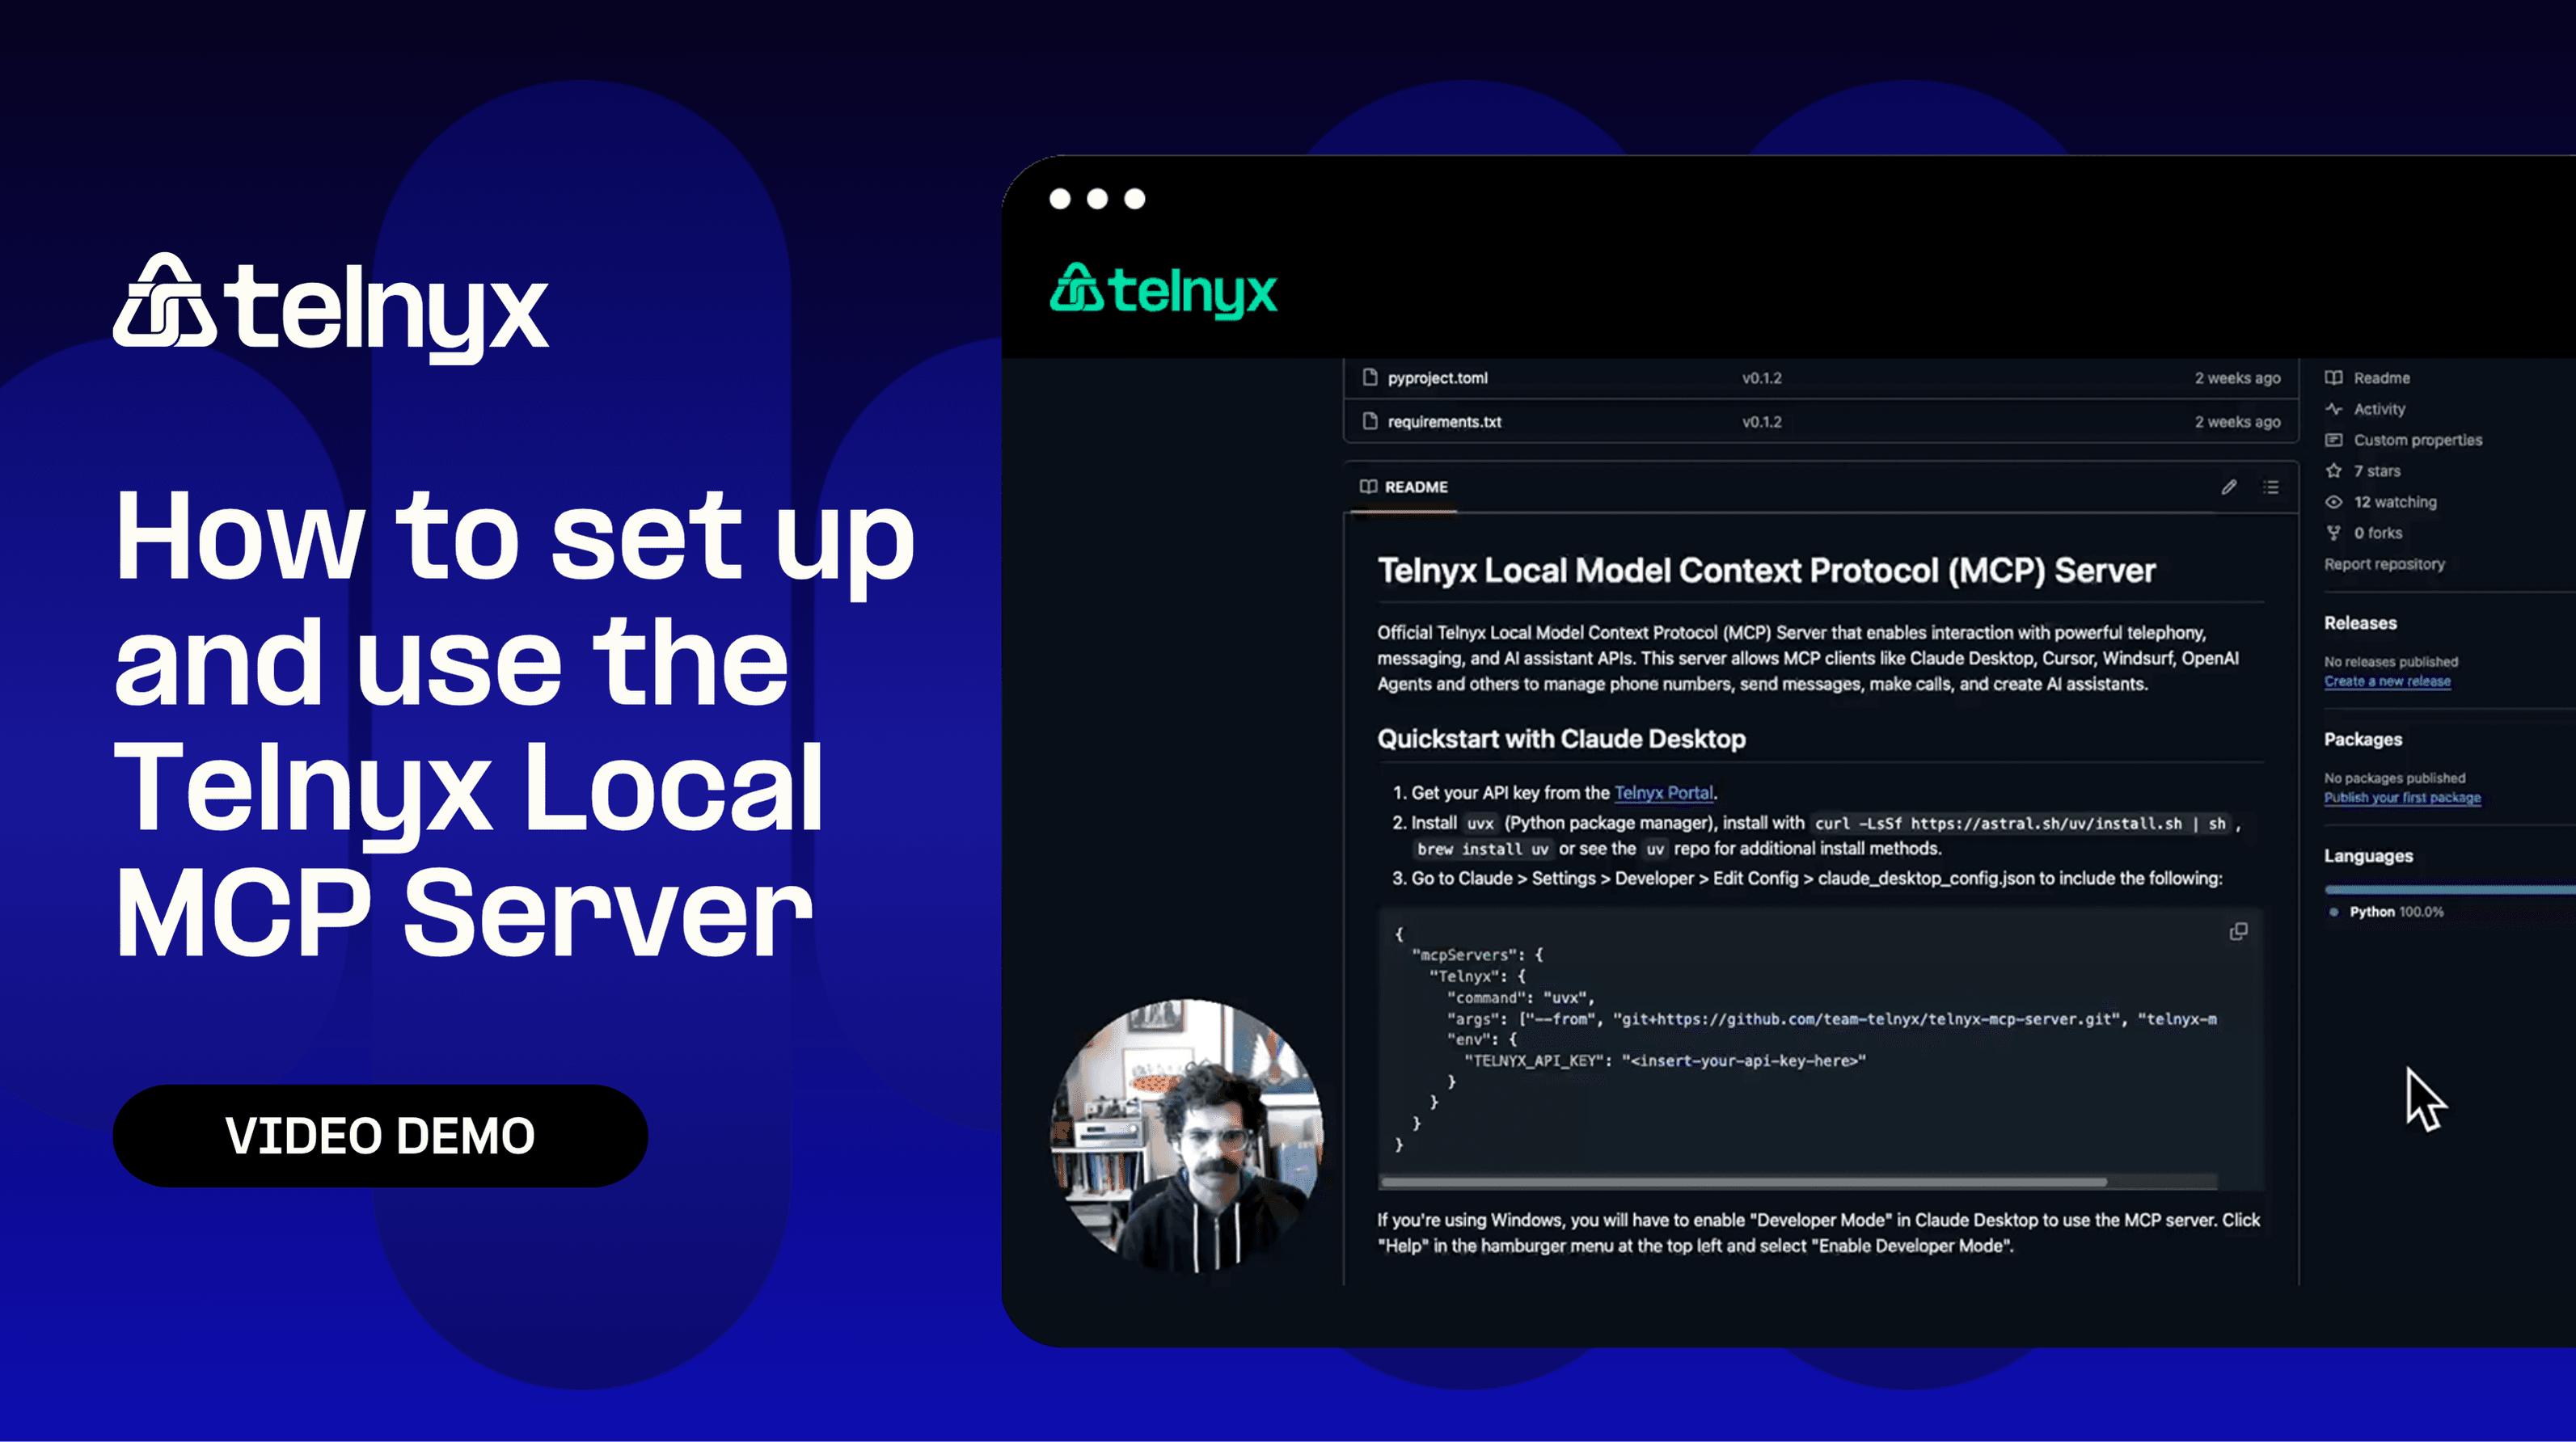
The Telnyx Local MCP (Model Context Protocol) Server streamlines your workflow and enhances your capabilities when handling real-time communications and AI assistance. This guide walks you through the step-by-step process of setting up and using Telnyx MCP server effectively.
Step 1: Gather prerequisites
To start, ensure you have the following prerequisites:
- Access to your Telnyx Mission Control Portal account to retrieve your API key.
- Access to the Telnyx GitHub repository.
- Claude desktop installed.
- ngrok installed and configured with your ngrok auth token if you're planning to use webhooks.
Step 2: Set up Telnyx MCP Server
First, clone the Telnyx MCP server repository from GitHub:
git clone https://github.com/team-telnyx/telnyx-mcp-server.git
cd telnyx-mcp-server
Step 3: Install dependencies
Next, install the necessary dependencies using Python’s package manager. If you don't have it yet, install UPX with Homebrew:
brew install uvAdditionally, ensure UVX (Python package manager) is installed via Curl or Homebrew:
Using Curl:
curl -sSL https://install.uvx.sh | shUsing Homebrew:
brew install uvStep 4: Configure Claude Desktop
You'll need to modify Claude's config.json file with your Telnyx API key:
- Open Claude Desktop.
- Go to Settings → Developer → Edit Config.
- Add your Telnyx API key in the appropriate field.
- Update the file path to your cloned MCP server using your terminal (pwd command gives the current path).
Step 5: Launch and test
Start the MCP server and ensure it integrates correctly with Claude desktop. Test its functionality by making requests directly through Claude.
For example, search for a Telnyx phone number:
- Request a phone number with specific features like HD voice and a particular area code (e.g., 773).
- Confirm that Claude handles the query and modifies parameters appropriately, like adding a country prefix.
Step 6: Purchasing and configuring phone numbers
Claude can directly interact with Telnyx’s API to purchase phone numbers and configure them for use with Telnyx AI Assistants. For instance:
- Ask Claude to purchase a selected number and link it to your Telnyx account.
- Set up an AI assistant to handle inbound calls, providing specific details like business hours and accepted insurance providers.
Step 7: Refinement and testing
Use Claude to refine the assistant's prompt and instructions if initial testing indicates issues (e.g., incorrect time formatting).
- Modify assistant instructions to ensure accurate communication (e.g., changing from "900" to "9:00 a.m.").
- Validate improvements through additional testing via Claude's interface.
Results
Upon completion, you should have a fully functional, Telnyx-powered AI assistant capable of:
- Handling inbound calls with accurate and helpful responses.
- Providing key information like business hours and insurance coverage clearly and effectively.
Integrating Telnyx MCP server with Claude desktop simplifies the process, enabling quick iterations and improvements without extensive prompting expertise.
Share on Social